
Easy Pumpkin Carving Ideas For Beginners: Step-By-Step Designs
Triangle eyes and a zigzag mouth take five minutes and look like five minutes. These take twenty and look like an hour.
None of them need a steady hand - they need the right order and the right tool.
Honest note: we make cards, pin badges, prints and party decorations, not carving tools.
Shop the cards that go with these
Shop party decorations Bunting and banners Halloween cards Funny pin badges
Party decorations, designed and printed by us
Banners, bunting, balloons and confetti for the Halloween party, printed in the UK.


The order that makes it easy
- Cut the lid at an angle, with a notch at the back so it goes back on the right way.
- Scrape the inside wall down to about 2cm thick where you'll carve. Thin walls cut like butter.
- Draw the design on with a marker pen. Wrong lines wipe off with a damp cloth.
- Drill or poke the outline as dots first, then saw between the dots.
- Push cut pieces out from the inside, never pull them out from the front.
Designs that look harder than they are
- Dot patterns: drill holes only, in spirals or constellations. No sawing at all and it glows beautifully.
- The scraped moon: cut one crescent right through, then scrape the skin off around it so it glows faintly.
- Cat silhouette: one solid shape, all the edges curved, no fiddly middle bits.
- Stacked pumpkins: three sizes, one word or letter carved in each.
- Ghost faces: two ovals and a wobble. Simple and genuinely eerie at night.
- Spider web: straight lines from the centre, curves between them, drilled dots at the joins.
Using stencils properly
- Tape the paper flat onto the pumpkin - snip the edges of the paper so it curves without creasing.
- Poke through the lines with a pin or a small drill every few millimetres.
- Lift the paper off and join the dots with the saw.
- Shade the parts you want to keep before you start, so you don't saw out the wrong side.
- A stencil takes the design decision away, which is the part beginners find hardest.
What each tool is for
- Small serrated saw: all the cutting. It goes through like a bread knife, with no force.
- Drill or poker: outlines, dot patterns and starting holes for the saw.
- Loop scraper: thinning the wall and shading areas so they glow without cutting through.
- Detail sculpting tools: fine lines, eyes and anything smaller than your thumb.
- Scoop: the insides, and nothing else.
- A 24-piece kit covers all of that - it's the difference between triangle eyes and a design you photograph.
Fixing mistakes
- Cut a piece out by accident? Pin it back with a toothpick from the inside.
- Cut too big? Widen the whole shape until it looks deliberate.
- Wonky face? Scrape the skin back around it so the light softens the edges.
- Cracked lid? Bin it, and put a strip of foil over the hole with the candle below.
- Nobody notices any of it once it's dark and lit.
Found your words? Now find the card
Shop party decorations Bunting and banners Halloween cards Funny pin badges
How to write it so it lands
- Thin the wall before you cut anything.
- Dots first, saw second.
- Push pieces out from the inside.
You might also be interested in...
We make cards, pin badges, prints and party bits in house. These are from other shops we rate, and buying through the link costs you nothing extra.
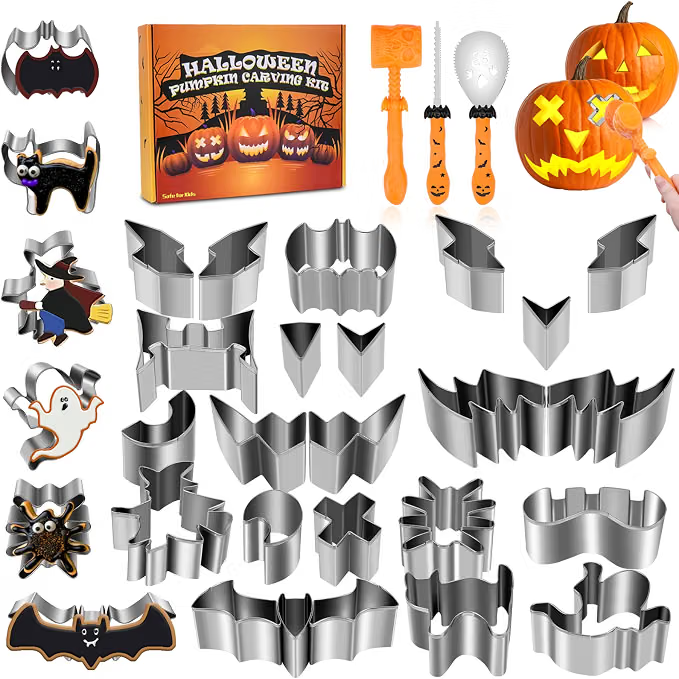
24Pcs Halloween Pumpkin Carving Kit
Where to shop next
- Party supplies
- Bunting and banners
- Halloween cards
- Funny pin badges
- How to host a pumpkin carving party
- Safe pumpkin carving for kids
- How to organise a pumpkin trail
- October half term activities
- Halloween doorstep ideas
- Halloween party ideas
- Kids Halloween party ideas
- Halloween party games
- Kids Halloween costumes
- Group and family Halloween costumes
- Halloween card messages
- Planning the party? Birthday party ideas
- How to make a balloon arch
- Photo booth prop ideas
- Pin badges
- All guides
Frequently asked questions
What is the easiest pumpkin design for a beginner?
A drilled dot pattern - holes only, no sawing. After that, a single solid silhouette like a cat or a ghost face, where every edge is one continuous curve.
How do you carve a pumpkin without it looking messy?
Scrape the inside wall thin first, draw the design in marker pen, poke the outline as dots, then saw between the dots. The order does the work.
What tools do you need to carve a pumpkin?
A small serrated saw, a drill or poker, a loop scraper for shading, fine sculpting tools for detail and a scoop for the insides.
How do you use a pumpkin carving stencil?
Tape it flat with snipped edges so it curves, poke through the lines every few millimetres, then lift the paper and join the dots with the saw.
Can you fix a pumpkin carving mistake?
Yes. Pin cut pieces back with a toothpick from inside, or widen the shape until it looks intentional. Once it's dark and lit, nobody can tell.
Do you sell pumpkin carving kits?
No. We design and print greetings cards, enamel pin badges, prints and party decorations in the UK. Carving tools are recommendations from elsewhere - the only things linked to our own shop are ours.